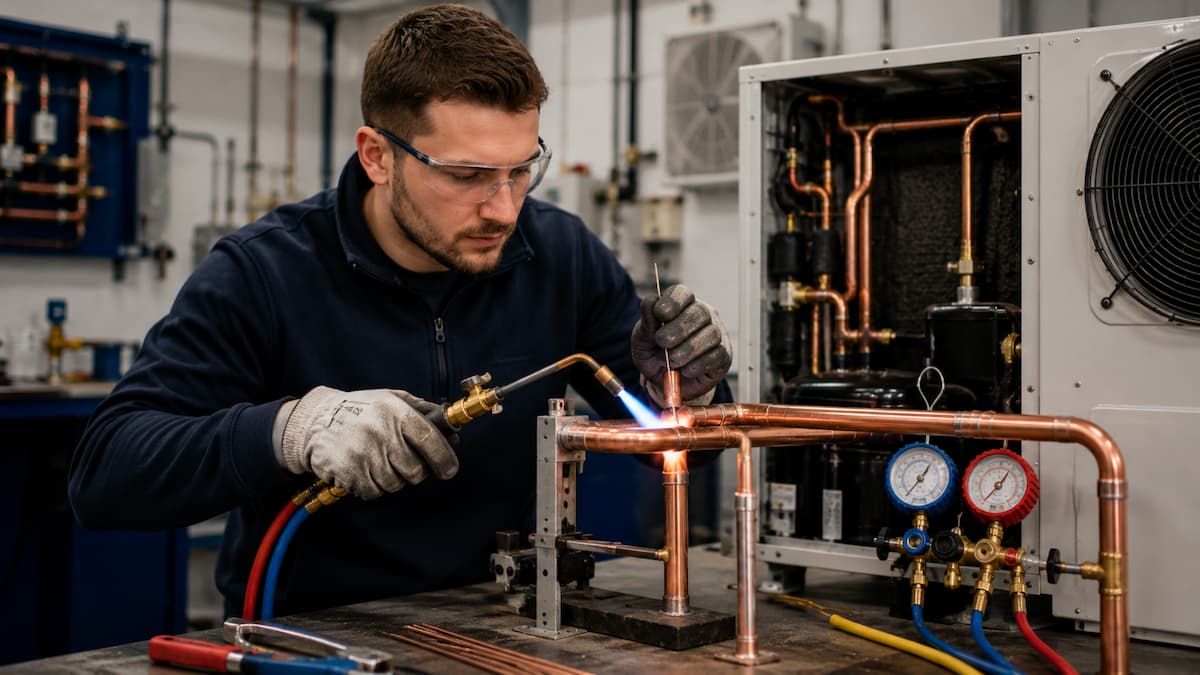
Tightness testing is one of the most important safety procedures carried out by gas engineers. A successful test provides confidence that a gas installation is sound and suitable for continued use. However, when a tightness test identifies pressure movement or gas leakage, the engineer’s role shifts from tester to fault finder.
Identifying the source of a gas leak is often far more challenging than carrying out the test itself. Leaks may be obvious and easily accessible, or concealed within floors, walls, ceilings, or void spaces. In some cases, pressure movement may not be caused by pipework leakage at all but by appliance components, regulators or installation characteristics.
The introduction of IGEM/UP/1B Edition 4 has added further depth to the fault-finding process. Installation volume calculations, appliance isolation requirements and revised pressure interpretation procedures now form part of the engineer’s decision-making process.
Rather than simply determining whether an installation passes or fails, engineers are now expected to understand the significance of pressure movement, identify its source and apply a structured fault-finding methodology.
We examine practical fault-finding techniques that help engineers efficiently locate gas leaks while remaining compliant with current industry standards.
Tightness Testing In Gas Safety
Every gas installation relies on pipework, fittings, valves and appliances remaining gas-tight throughout their service life.
A tightness test confirms that gas is not escaping from the installation under test conditions.
Installation Integrity
Gas tightness testing plays a critical role in:
- commissioning new installations
- recommissioning existing systems
- servicing and maintenance work
- appliance replacement
- landlord gas safety inspections
- fault diagnosis
Without effective tightness testing, gas escapes may remain undetected until they create dangerous conditions.
The objective is not simply compliance with regulations but the prevention of gas accumulation, fire, explosion and carbon monoxide-related incidents.
The Cost Of Incorrect Diagnosis
Poor fault-finding can create significant problems for both engineers and customers.
An engineer that incorrectly diagnoses the source of pressure movement may:
- replace components unnecessarily
- spend hours investigating the wrong area
- increase customer costs
- create repeat visits
- overlook genuine safety issues
Effective fault finding is therefore about accuracy as much as technical competence.
The most successful engineers adopt a methodical approach rather than relying on assumptions.
The Edition 4 Fault Finding Process
The publication of IGEM/UP/1B Edition 4 has altered how engineers interpret tightness-testing results.
Several of the changes directly influence fault-finding procedures.
Installation Volume Calculations
One of the most significant changes is the introduction of installation volume calculations.
Historically, permissible pressure movement was assessed using meter size criteria. Edition 4 now requires pressure movement to be assessed against the volume of gas contained within the installation.
This creates a more accurate representation of the installation being tested.
For fault-finding purposes, installation volume calculations help engineers determine whether observed pressure changes are significant enough to warrant further investigation.
Accurate calculations therefore become an important part of the diagnostic process.
Appliance Isolation Requirements
Edition 4 also introduces appliance isolation requirements where pressure movement has been detected and shown to fall within permissible limits.
This change recognises that connected appliances may contribute to pressure movement during a tightness test.
The engineer must now determine whether pressure movement originates from:
- appliance components
- installation pipework
- a genuine gas escape
By isolating appliances and repeating the test on the pipework only, engineers gain a clearer understanding of the source of the movement.
This additional step improves confidence in the final diagnosis.
Decision Making
One of the most important principles introduced in Edition 4 is the move towards decision-making.
Rather than relying on assumptions or experience alone, engineers are expected to gather evidence through:
- installation volume calculations
- appliance isolation procedures
- repeat testing
- leak detection techniques
- visual inspection
The result is a more robust and defensible fault-finding process.
Causes of Tightness Test Failures
Understanding where gas escapes are most likely to occur helps engineers focus their investigations effectively.
Although every installation is different, certain areas consistently appear during leak investigations.
Meter Installation Defects
The meter installation remains one of the most common sources of leakage.
Areas requiring close attention include:
- meter unions
- regulator connections
- test nipples
- emergency control valve connections
- meter tail connections
Many leaks identified during tightness testing are ultimately traced back to disturbed meter connections.
Appliance Connection Leaks
Appliance connections are another frequent source of problems.
Examples include:
- cooker bayonet fittings
- appliance isolation valves
- flexible hose connections
- appliance test points
- incorrectly tightened unions
Where appliances have recently been installed, serviced or replaced, these areas should receive particular attention.
Pipework Defects
Pipework itself can develop leaks for a variety of reasons.
Examples include:
- poorly made compression joints
- defective soldered joints
- damaged threaded connections
- mechanical damage
- vibration related movement
Leaks may develop gradually over time or occur suddenly in response to external influences.
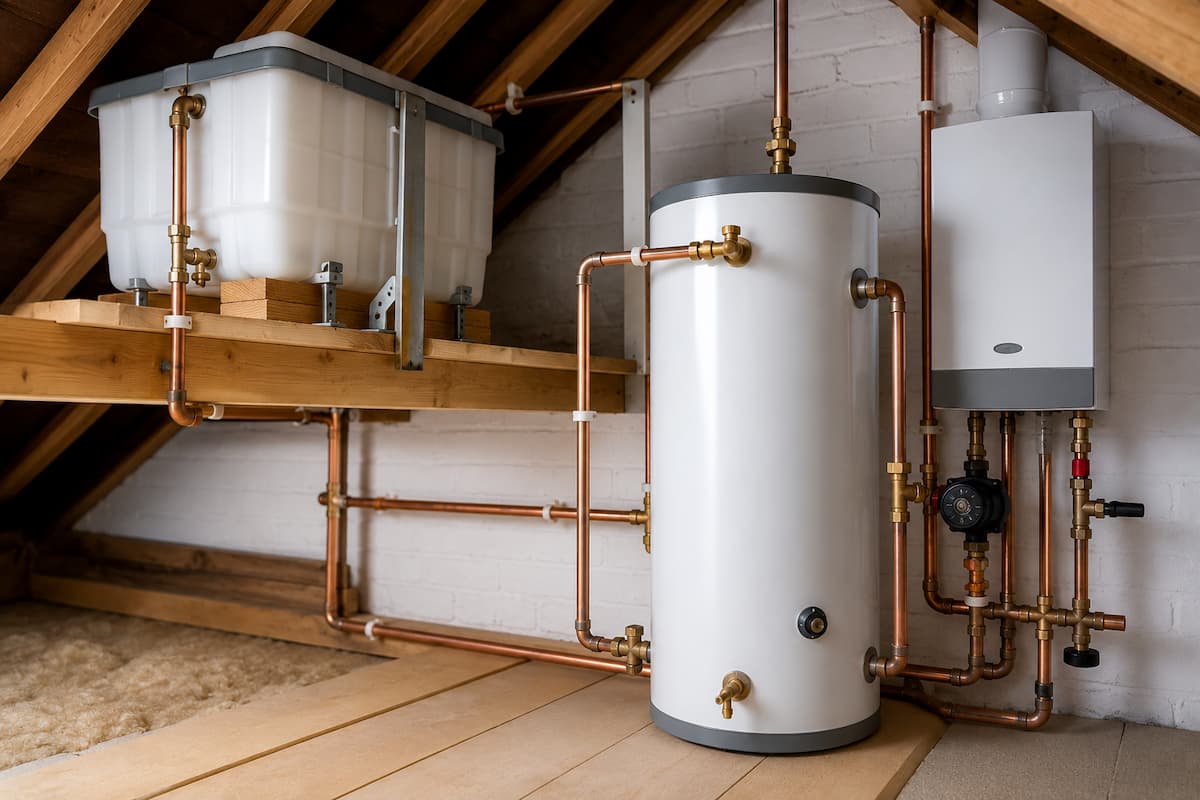
Concealed Pipework Leaks
Concealed pipework presents one of the most challenging fault-finding scenarios.
Potential locations include:
- floor voids
- wall cavities
- suspended ceilings
- service risers
- underground pipe runs
The absence of visible evidence often makes these leaks difficult to locate.
A structured approach becomes essential.
Deterioration and Corrosion
Older installations may suffer from deterioration that affects gas tightness.
Contributing factors may include:
- moisture exposure
- environmental contamination
- mechanical wear
- poor installation practices
- corrosion
Where installations are several decades old, deterioration should always be considered during fault-finding.
Leak Locations Reference Table
| Location | Typical Cause | Likelihood | Investigation Method |
|---|---|---|---|
| Meter Union | Loose connection or disturbed fitting | High | Visual inspection and LDF |
| Test Nipple | Poor reinstatement | High | LDF and pressure verification |
| Appliance Valve | Internal valve leakage | Medium | Appliance isolation test |
| Compression Joint | Poor installation or movement | Medium | LDF and detector survey |
| Concealed Pipework | Corrosion or mechanical damage | Medium | Sectional testing and detection equipment |
| Flexible Connection | Wear or deterioration | Medium | Visual inspection and LDF |
A Structured Fault Finding Methodology
Successful fault finding follows a logical sequence.
Jumping between potential causes often wastes time and increases the risk of incorrect conclusions.
Step One: Verify The Tightness Test
Before investigating a leak, engineers should first verify the validity of the test itself.
Checks should include:
- pressure gauge accuracy
- equipment condition
- correct test pressure
- stabilisation period
- test duration
- installation volume calculations
Fault finding should never begin until the engineer is satisfied the test results are reliable.
Step Two: Eliminate Appliance Influence
Where pressure movement falls within permissible limits, Edition 4 requires appliance isolation and pipework only retesting.
This stage is critical because it removes appliance influences from the investigation.
The results often determine the direction of subsequent fault-finding activities.
Step Three: Divide and Locate
Where leakage remains present, the next objective is to reduce the area under investigation.
This may involve:
- sectional isolation
- branch testing
- appliance disconnection
- progressive pressure testing
The principle is simple.
Reduce the size of the system under test until the source of the leak becomes easier to identify.
Step Four: Confirm The Defect
Once a likely source has been identified, engineers should confirm the defect using appropriate methods.
These may include:
- electronic gas detectors
- leak detection fluid
- visual inspection
- repeat testing
Repairs should never be based solely on assumptions.
Confirmation remains essential.
Pressure Interpretation Under Edition 4
Correct interpretation of pressure movement is fundamental to effective fault finding.
No Perceptible Movement
Where no perceptible movement is observed during the test period, the installation passes the tightness test.
No further fault finding is required unless additional evidence suggests a problem exists.
Pressure Movement Within Permissible Limits
Where pressure movement is detected and shown to fall within the permissible limits, appliance isolation becomes necessary.
The engineer must determine whether the movement originates from appliances or installation pipework.
This represents one of the most important procedural changes introduced by Edition 4.
Pressure Movement Exceeding Permissible Limits
Where pressure movement exceeds the permissible limits, further investigation is required immediately.
The installation cannot be considered satisfactory until the source of the leakage has been identified and corrected.
Movement Remaining After Appliance Isolation
If pressure movement remains following appliance isolation and repeat testing, the evidence strongly suggests leakage within the installation pipework.
At this stage, sectional testing and leak location techniques become the primary focus of the investigation.
The ability to interpret these results correctly forms the foundation of effective gas tightness testing fault-finding.
Fault Finding Scenarios
Understanding the theory behind tightness testing is important, but practical fault-finding skills are developed through real experience. The following scenarios demonstrate how engineers can apply Edition 4 procedures when investigating pressure movement and suspected gas escapes.
Scenario One: Appliance Related Pressure Movement
An engineer conducts a tightness test and observes pressure fluctuations during the test period.
Installation volume calculations confirm the movement falls within the permissible limits specified by Edition 4.
Following the revised procedure, the engineer isolates all appliances and repeats the test on the installation pipework.
No perceptible movement is observed during the repeat test.
In this scenario, the evidence suggests that the original pressure movement was associated with appliance components rather than pipework leakage.
The installation pipework can therefore be considered satisfactory.
This example demonstrates why appliance isolation has become such an important part of the revised testing process.
Scenario Two: Meter Union Leak
An engineer records pressure movement exceeding the permissible limits.
Visual inspection identifies slight staining around a meter union connection.
Leak detection fluid is applied, and bubbling is observed.
The defective union is tightened, retested and confirmed gas-tight.
A repeat tightness test confirms the installation now passes.
This is a relatively straightforward example, but it highlights the importance of beginning investigations with accessible components before assuming more complex defects.
Scenario Three: Concealed Pipework Leak
A domestic installation fails the tightness test, and appliance isolation confirms the leakage remains present within the pipework.
No visible signs of leakage can be found.
The engineer progressively isolates sections of the installation and eventually narrows the fault to a concealed pipe run beneath a suspended floor.
Further investigation reveals corrosion damage to a section of a steel pipe.
This scenario demonstrates the value of sectional testing and systematic elimination.
Scenario Four: Multiple Minor Leaks
An installation fails the tightness test, but no single significant leak can be identified.
Detailed inspection eventually reveals several small leaks at different compression fittings.
Individually, the leaks appear insignificant.
Collectively, they exceed the permissible pressure movement limits.
Multiple minor leaks are often more difficult to identify than a single large defect.
A methodical inspection process becomes essential.
Scenario Five: Intermittent Leak Conditions
An engineer receives reports of a gas smell, yet repeated tightness tests produce inconsistent results.
Further investigation reveals that pipework movement due to thermal expansion causes leakage under certain operating conditions.
Intermittent faults can be among the most challenging defects to diagnose.
Patience, repeat testing and detailed observation are often required.
Using Electronic Gas Detectors
Electronic gas detectors are valuable fault-finding tools, particularly when investigating concealed leakage.
However, they should be used as part of a structured investigation rather than as a replacement for sound engineering judgement.
Detector Selection
Not all gas detectors perform equally.
Engineers should ensure their equipment is:
- suitable for the gas being detected
- calibrated correctly
- maintained in accordance with manufacturer requirements
- appropriate for the environment being surveyed
Using unsuitable equipment can lead to misleading results.
Sweep Testing Requirements
When carrying out a detector survey, engineers should adopt a systematic approach.
Areas requiring attention include:
- meter installations
- appliance connections
- floor voids
- service penetrations
- concealed pipe routes
- risers and ducts
Moving too quickly can result in leaks being missed.
A slow, deliberate survey generally produces more reliable results.
Investigating Positive Readings
A positive detector reading does not automatically identify the precise location of a leak.
Gas can migrate considerable distances from the source.
Where elevated readings are identified, engineers should:
- increase survey detail
- inspect surrounding areas
- use additional confirmation methods
- verify findings through pressure testing where appropriate
Confirmation is always important.
Detection Errors
Typical mistakes include:
- relying solely on detector readings
- failing to calibrate equipment
- surveying too quickly
- overlooking ventilation influences
- failing to investigate beyond the initial reading
The detector should support the investigation, not dictate it.
Detector Limitations
Electronic gas detectors are extremely useful, but they are not infallible.
Factors that may affect performance include:
- airflow
- environmental contamination
- humidity
- temperature
- access restrictions
Understanding these limitations helps engineers interpret readings more effectively.
Leak Detection Fluid Best Practice
Leak detection fluid remains one of the simplest and most effective methods of confirming leakage at accessible joints.
When used correctly, it provides immediate visual evidence of gas escape.
Correct Application Techniques
The fluid should be applied generously enough to cover the entire joint or fitting under investigation.
Particular attention should be given to:
- meter unions
- test nipples
- appliance valves
- compression fittings
- threaded joints
The engineer should allow sufficient observation time before concluding.
Verification Procedures
Where bubbling is observed:
- confirm the source of leakage
- repair the defect
- reapply leak detection fluid
- complete a repeat tightness test
The repair should never be assumed successful until verification is complete.
Mistakes
Frequent errors include:
- applying insufficient fluid
- wiping the joint too quickly
- overlooking adjacent fittings
- failing to inspect reinstated test nipples
- using leak detection fluid as the sole method of investigation
Leak detection fluid should form part of a wider fault-finding strategy.
Situations Requiring Additional Investigation
Some leaks may not be visible using leak detection fluid alone.
Examples include:
- concealed pipework defects
- intermittent leaks
- inaccessible joints
- internal appliance leakage
In these situations, additional investigation methods will be required.
Sectional Testing Techniques
Sectional testing is one of the most effective methods of locating pipework leaks.
The objective is to progressively reduce the area under investigation until the defect can be identified.
Dividing Large Installations
Where practical, installations should be divided into manageable sections.
This may involve:
- branch isolation
- appliance disconnection
- sectional valve operation
- temporary blanking arrangements
Reducing system size often accelerates fault identification.
Testing Branches Individually
Individual branches can be tested separately to determine whether the leakage exists within a particular section of the installation.
This process helps eliminate unaffected areas and focuses attention where it is most needed.
Commercial Installation Considerations
Commercial systems often contain:
- multiple appliances
- extensive pipework
- numerous branches
- complex layouts
Sectional testing becomes particularly valuable in these environments.
Without a structured approach, investigations can become lengthy and inefficient.
Confirming Repair Effectiveness
Following repairs, the affected section should be retested before the entire installation is recommissioned.
This provides confidence that the identified defect has been successfully rectified.
Many experienced engineers retest both the repaired section and the complete installation before returning the system to service.
Tightness Testing Fault Finding Workflow
Fault finding is most effective when approached as a structured process rather than a series of individual tests.
A typical workflow may follow this sequence:
- Complete tightness test.
- Identify pressure movement.
- Calculate installation volume.
- Compare results against permissible limits.
- Isolate appliances where required.
- Repeat pipework only test.
- Determine whether leakage remains.
- Narrow the investigation area through sectional testing.
- Confirm defects using detection methods.
- Complete repairs.
- Retest the installation.
- Document findings and actions.
This structured approach aligns closely with the philosophy behind Edition 4 and promotes consistency across investigations.
Tightness Testing and Unsafe Situations
Fault finding should always be considered alongside the Gas Industry Unsafe Situations Procedure.
A failed tightness test is not simply a technical issue. It may indicate a condition that presents a risk to occupants or property.
Gas Escapes and Unsafe Situations
The severity of a gas escape depends upon:
- leak size
- location
- ventilation conditions
- occupancy
- proximity to ignition sources
Not all gas escapes present the same level of risk.
Engineers must assess both the circumstances and the defect itself.
At Risk Situations
An installation may be classified as At Risk where a recognised fault exists that could become dangerous if an additional fault or event occurs.
Examples may include:
- minor leakage requiring corrective action
- deteriorating pipework
- safety margins reduced by multiple defects
Appropriate action should be taken in accordance with current procedures.
Immediately Dangerous Situations
Immediately Dangerous classifications apply where there is an immediate threat to life or property.
Examples may include:
- significant gas escapes
- active gas accumulation
- severely damaged pipework
- uncontrolled gas release
Immediate action is required to remove the danger.
Isolation Procedures
Where danger exists, engineers may need to:
- isolate appliances
- isolate sections of pipework
- close the Emergency Control Valve
- disconnect unsafe equipment
The action taken should always reflect the level of risk identified.
Customer Communication
Technical competence alone is not enough.
Customers should be informed clearly about:
- defects identified
- risks involved
- actions taken
- recommendations for corrective work
- limitations placed on the installation
Clear communication helps protect both the customer and the engineer.
Documentation Requirements
Every fault-finding investigation should be documented carefully.
Records should include:
- test results
- installation volume calculations
- appliance isolation actions
- defects identified
- repairs completed
- unsafe situations classifications
- customer communications
Accurate records provide evidence of competence, compliance and due diligence.
Fault Finding Mistakes
Even experienced engineers can encounter difficulties when investigating failed tightness tests. In many cases, the problem is not a lack of technical knowledge but a failure to follow a structured fault-finding process.
Understanding common mistakes can help engineers improve efficiency, reduce unnecessary work and avoid incorrect conclusions.
Chasing The Wrong Leak
One of the most common errors is focusing on the first potential defect identified without confirming it is responsible for the pressure movement.
For example, a minor seepage at a compression fitting may be visible during inspection. Yet, the actual cause of the failed tightness test could be a concealed leak elsewhere within the installation.
Every suspected defect should be confirmed through appropriate testing rather than assumption.
Assuming Appliance Leakage
Edition 4 specifically introduced appliance isolation requirements to address this issue.
Historically, some engineers attributed pressure movement to appliance components without carrying out sufficient verification.
The revised procedure now requires evidence only from appliance isolation and pipework retesting.
Assumptions should never replace testing.
Ignoring Installation Volume
Installation volume calculations now play a critical role in pressure interpretation.
Errors may occur when engineers:
- use inaccurate pipe measurements
- overlook concealed pipework
- apply incorrect volume values
- fail to include all sections of the installation
Incorrect calculations can lead to incorrect conclusions regarding whether pressure movement is acceptable.
Poor Documentation
Many engineers focus heavily on the technical investigation while overlooking documentation.
However, records often become the only evidence available during:
- audits
- inspections
- customer disputes
- incident investigations
If the investigation is not documented properly, it may be difficult to demonstrate that appropriate procedures were followed.
Incomplete Retesting
Repairs should never be considered complete until verification testing has been carried out.
Mistakes include:
- repairing a defect without completing a repeat tightness test
- failing to verify disturbed joints
- relying solely on visual inspection
- omitting appliance reinstatement checks
Successful fault finding always ends with confirmation.
Confirmation Bias
Confirmation bias occurs when engineers become convinced they have identified the cause of a fault and begin ignoring evidence to the contrary.
This can lead to:
- unnecessary repairs
- prolonged investigations
- missed defects
A structured methodology helps reduce the risk of this occurring.
ACS Assessment Fault Finding Scenarios
The introduction of Edition 4 means fault-finding skills are likely to feature more prominently within ACS assessments and reassessments.
Assessors increasingly expect candidates to demonstrate both technical knowledge and logical decision-making.
Practical Assessment Expectations
Candidates may be required to:
- interpret tightness testing results
- calculate installation volume
- explain appliance isolation requirements
- identify appropriate fault-finding techniques
- determine suitable corrective actions
The focus is not simply on obtaining the correct answer but on demonstrating the reasoning behind that answer.
Scenario One: Pressure Movement Within Permissible Limits
A candidate observes pressure movement during a tightness test.
Installation volume calculations confirm the movement falls within permissible limits.
The assessor asks for the next step.
The expected response is appliance isolation, followed by a pipework-only retest.
Candidates that proceed directly to leak investigation may demonstrate a lack of understanding of the revised procedure.
Scenario Two: Pressure Movement Remains After Isolation
Appliances are isolated, and the repeat test still shows pressure movement.
The candidate must recognise that the installation pipework now becomes the primary focus of the investigation.
This scenario assesses understanding of the distinction between appliance-related influences and pipework leakage.
Scenario Three: Concealed Pipework Investigation
A leak cannot be located visually.
The candidate is expected to explain:
- sectional testing techniques
- detector use
- investigation priorities
- documentation requirements
Assessors will often focus on the engineer’s logical approach rather than the specific defect itself.
Candidate Errors
Common reassessment mistakes include:
- incorrect installation volume calculations
- misunderstanding pressure interpretation
- failure to isolate appliances
- poor understanding of unsafe situations implications
- weak technical justification for decisions
Candidates who understand the reasoning behind Edition 4 generally perform more confidently during assessments.
Demonstrating Competence
Competence is demonstrated through:
- technical knowledge
- practical understanding
- structured decision making
- accurate documentation
- safe working practices
The strongest candidates consistently combine all of these elements.
Tightness Testing Fault Finding Checklist
The following checklist provides a practical reference for engineers conducting fault-finding investigations.
| Action | Completed |
|---|---|
| Initial tightness test completed | ☐ |
| Installation volume calculated | ☐ |
| Pressure movement assessed | ☐ |
| Appliances isolated where required | ☐ |
| Pipework only retest completed | ☐ |
| Leak source investigation completed | ☐ |
| Electronic detector survey completed | ☐ |
| Leak detection fluid verification completed | ☐ |
| Repairs completed | ☐ |
| Final tightness test completed | ☐ |
| Documentation completed | ☐ |
Gas Training Courses In Staffordshire
The changes introduced by IGEM/UP/1B Edition 4 highlight the importance of maintaining current technical knowledge and practical competence.
Fault-finding is a skill that develops through a combination of experience, structured training, and a strong understanding of industry standards.
Staying Current With Technical Standards
Gas safety standards continue to evolve as new guidance, industry experience and technical developments shape best practice.
Engineers who maintain their knowledge are better positioned to:
- interpret test results accurately
- identify defects efficiently
- apply updated procedures correctly
- demonstrate compliance during inspections and audits
ACS Reassessment Preparation
Many of the topics covered within this article are directly relevant to ACS reassessment activities.
Engineers should ensure they remain confident in:
- gas soundness procedures
- installation volume calculations
- appliance isolation requirements
- fault finding methodology
- unsafe situations procedures
Regular training helps maintain competence and reduces the likelihood of knowledge gaps developing over time.
Tightness Testing Competence
Gas tightness testing remains one of the most important safety procedures undertaken by gas engineers.
Developing competence in:
- pressure interpretation
- leak detection
- sectional testing
- investigation techniques
- documentation
helps engineers work more effectively while maintaining compliance with current standards.
Technical Update Training
Major changes, such as those in Edition 4, demonstrate the value of regular technical update training.
Structured learning provides opportunities to:
- review procedural changes
- discuss practical scenarios
- strengthen technical understanding
- improve confidence when applying new requirements
This can be particularly valuable for engineers returning to gas work after a period away from the industry.
Continuing Professional Development
The most effective engineers view professional development as an ongoing process rather than something undertaken solely for reassessment purposes.
Continuous learning supports:
- technical competence
- professional confidence
- customer trust
- regulatory compliance
- safe working practices
At Staffordshire Training Services, engineers can access gas training courses and assessment programmes designed to support competence throughout every stage of their careers.
Building Better Fault Finding Skills
Gas tightness testing fault finding is about far more than locating leaks. It requires engineers to gather evidence, interpret results correctly and apply a logical investigation process that leads to reliable conclusions.
The introduction of IGEM/UP/1B Edition 4 has strengthened this approach by introducing installation volume calculations, appliance isolation requirements and more robust pressure interpretation procedures.
These changes encourage engineers to move beyond simple pass-or-fail testing and towards a deeper understanding of installation behaviour.
Successful fault finding depends upon:
- accurate testing
- correct interpretation of results
- systematic investigation
- effective use of detection equipment
- thorough documentation
- sound engineering judgement
Engineers who develop these skills are more likely to identify defects efficiently, avoid unnecessary repairs and maintain the highest standards of gas safety.
Ultimately, effective fault finding is not just about locating a leak. It is about understanding the installation, applying the correct procedures and ensuring every decision is supported by evidence. That approach not only supports compliance with Edition 4 but also helps protect property, safeguard occupants and uphold professional standards across the gas industry.
Related Articles
- Update To Tightness Testing Standards
- Tightness Testing and Gas Soundness For Engineers
- Gas Pressure Testing and Appliance Performance For Engineers
- Combustion Analysis and Flue Gas Testing For Gas Engineers
- Ventilation and Flueing Requirements For Gas Appliances
Prefer an AI Summary?